WallFrame 1/5 - RGB
Introduction
This guide will walk you through the process of setting up Visual Studio Code (VS Code) for programming the Raspberry Pi Pico W using the MicroPico module, and then driving RGB LEDs (e.g. WS2812B). The Raspberry Pi Pico W is a microcontroller board with built-in Wi-Fi capabilities, and the MicroPico module allows you to program it using MicroPython.

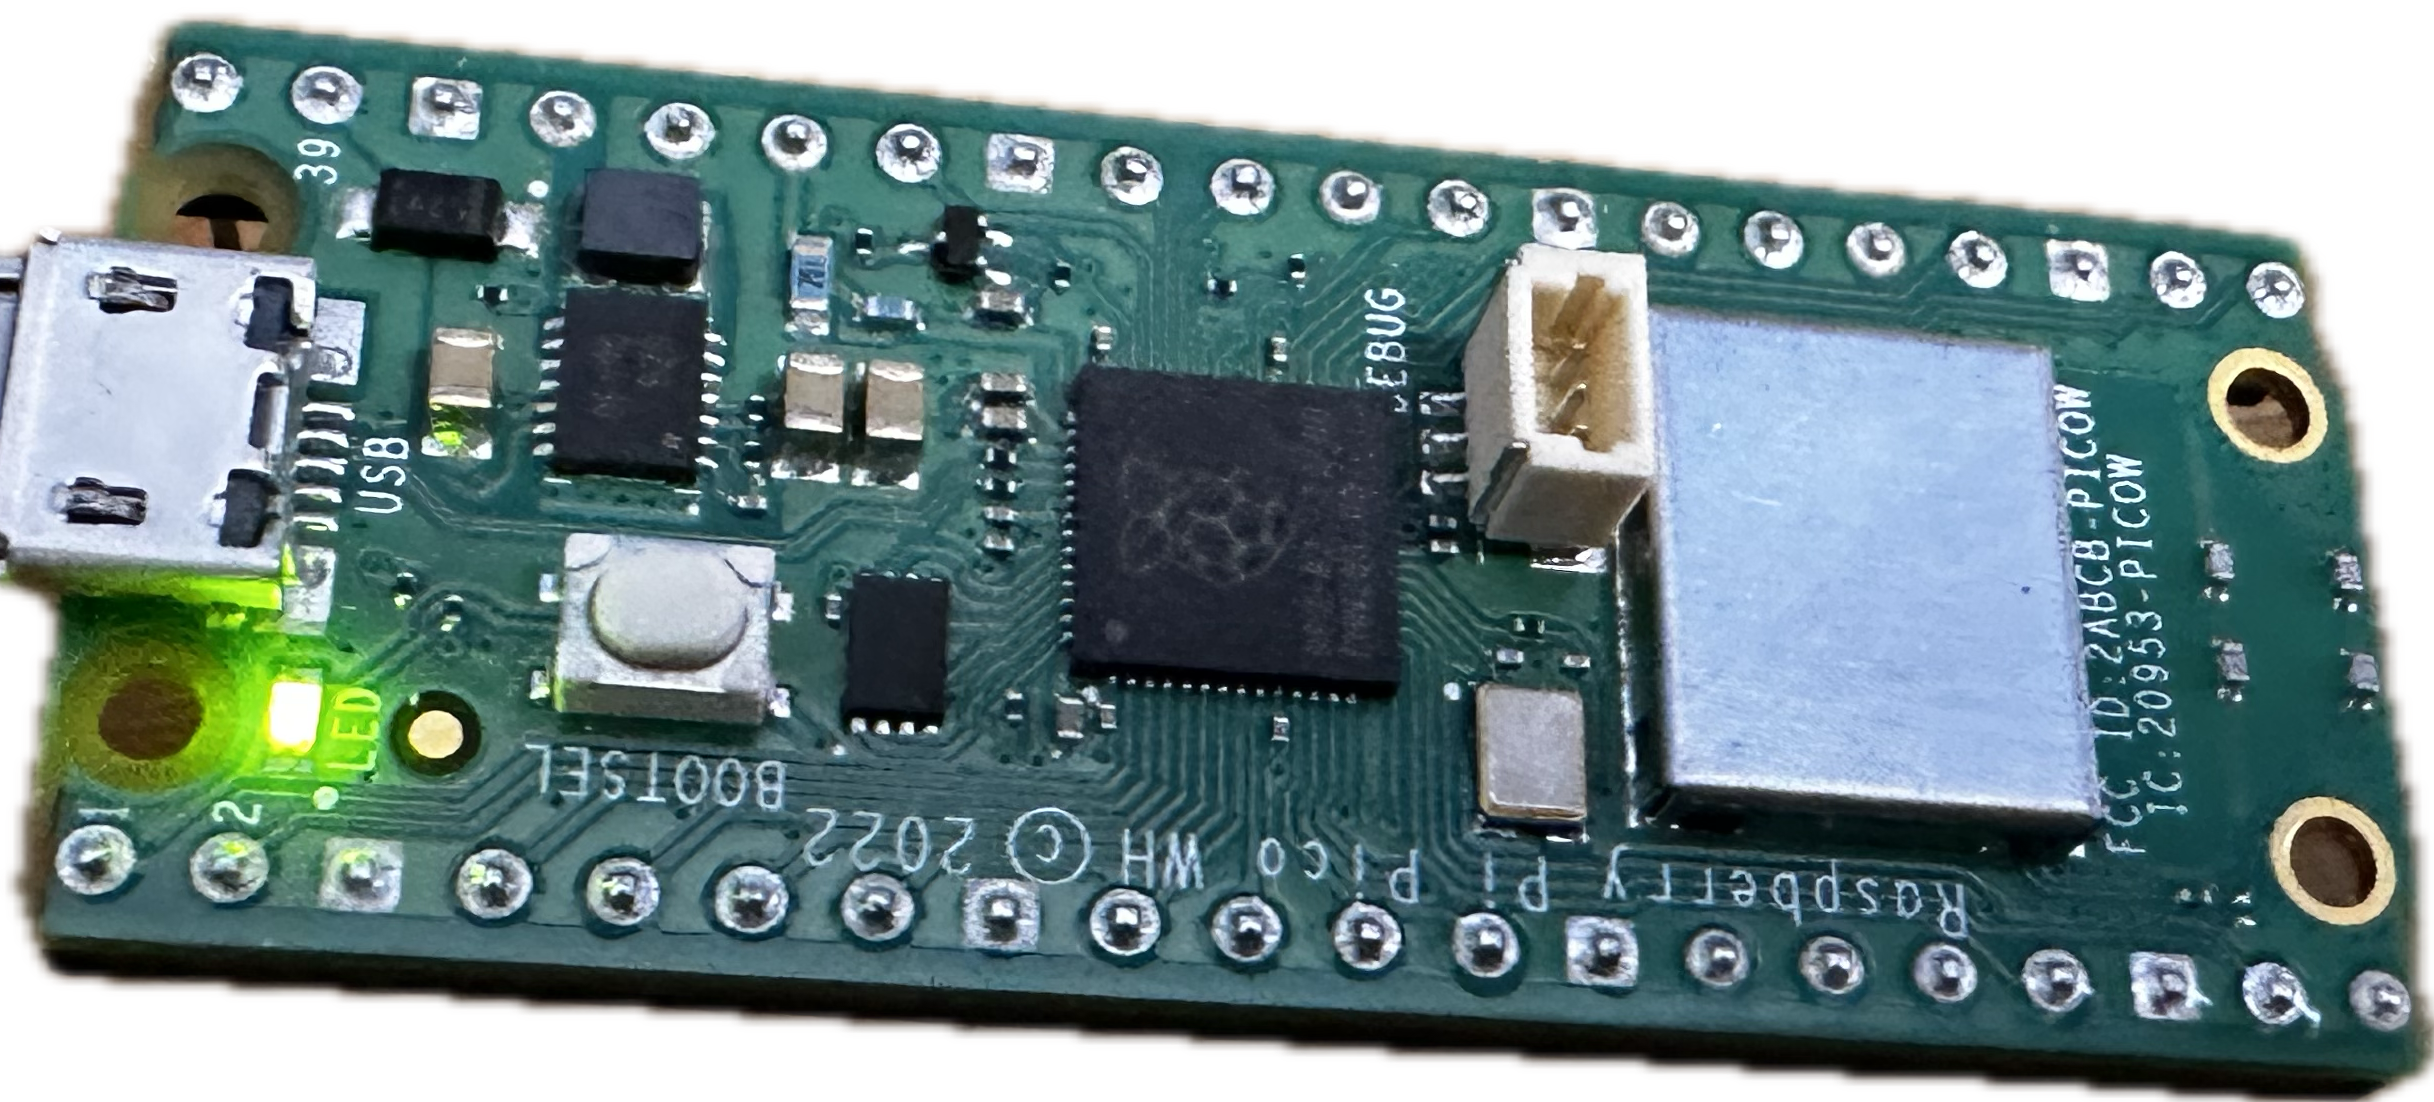
RPi Pico W pinout
Prerequisites
- Raspberry Pi Pico W board
- Visual Studio Code (VS Code) installed on your computer
- MicroPico module
- MicroPython firmware for Raspberry Pi Pico W
- WS2812B RGB stripes
All electronics will be explained in a futur post.
Step-by-Step installing environment and testing
Short walks through MicroPython environment from installation to testing the onboard LED.
Step 1: Install the MicroPython Firmware
- Download the MicroPython Firmware:
- Go to the MicroPython download page.
- Download the latest MicroPython firmware for the Raspberry Pi Pico W.
- Flash the Firmware:
- Hold down the BOOTSEL button on the Pico W while plugging it into your computer via USB.
- This will mount the Pico W as a storage device.
- Drag and drop the downloaded
.uf2firmware file onto the mounted storage device. - The Pico W will automatically reboot with the new firmware.
Step 2: Install VS Code Extensions
- Open VS Code:
- Launch Visual Studio Code on your computer.
- Install the Python Extension:
- Go to the Extensions view by clicking the Extensions icon in the Activity Bar on the side of the window or by pressing
Ctrl+Shift+X. - Search for “Python” and install the extension provided by Microsoft.
- Go to the Extensions view by clicking the Extensions icon in the Activity Bar on the side of the window or by pressing
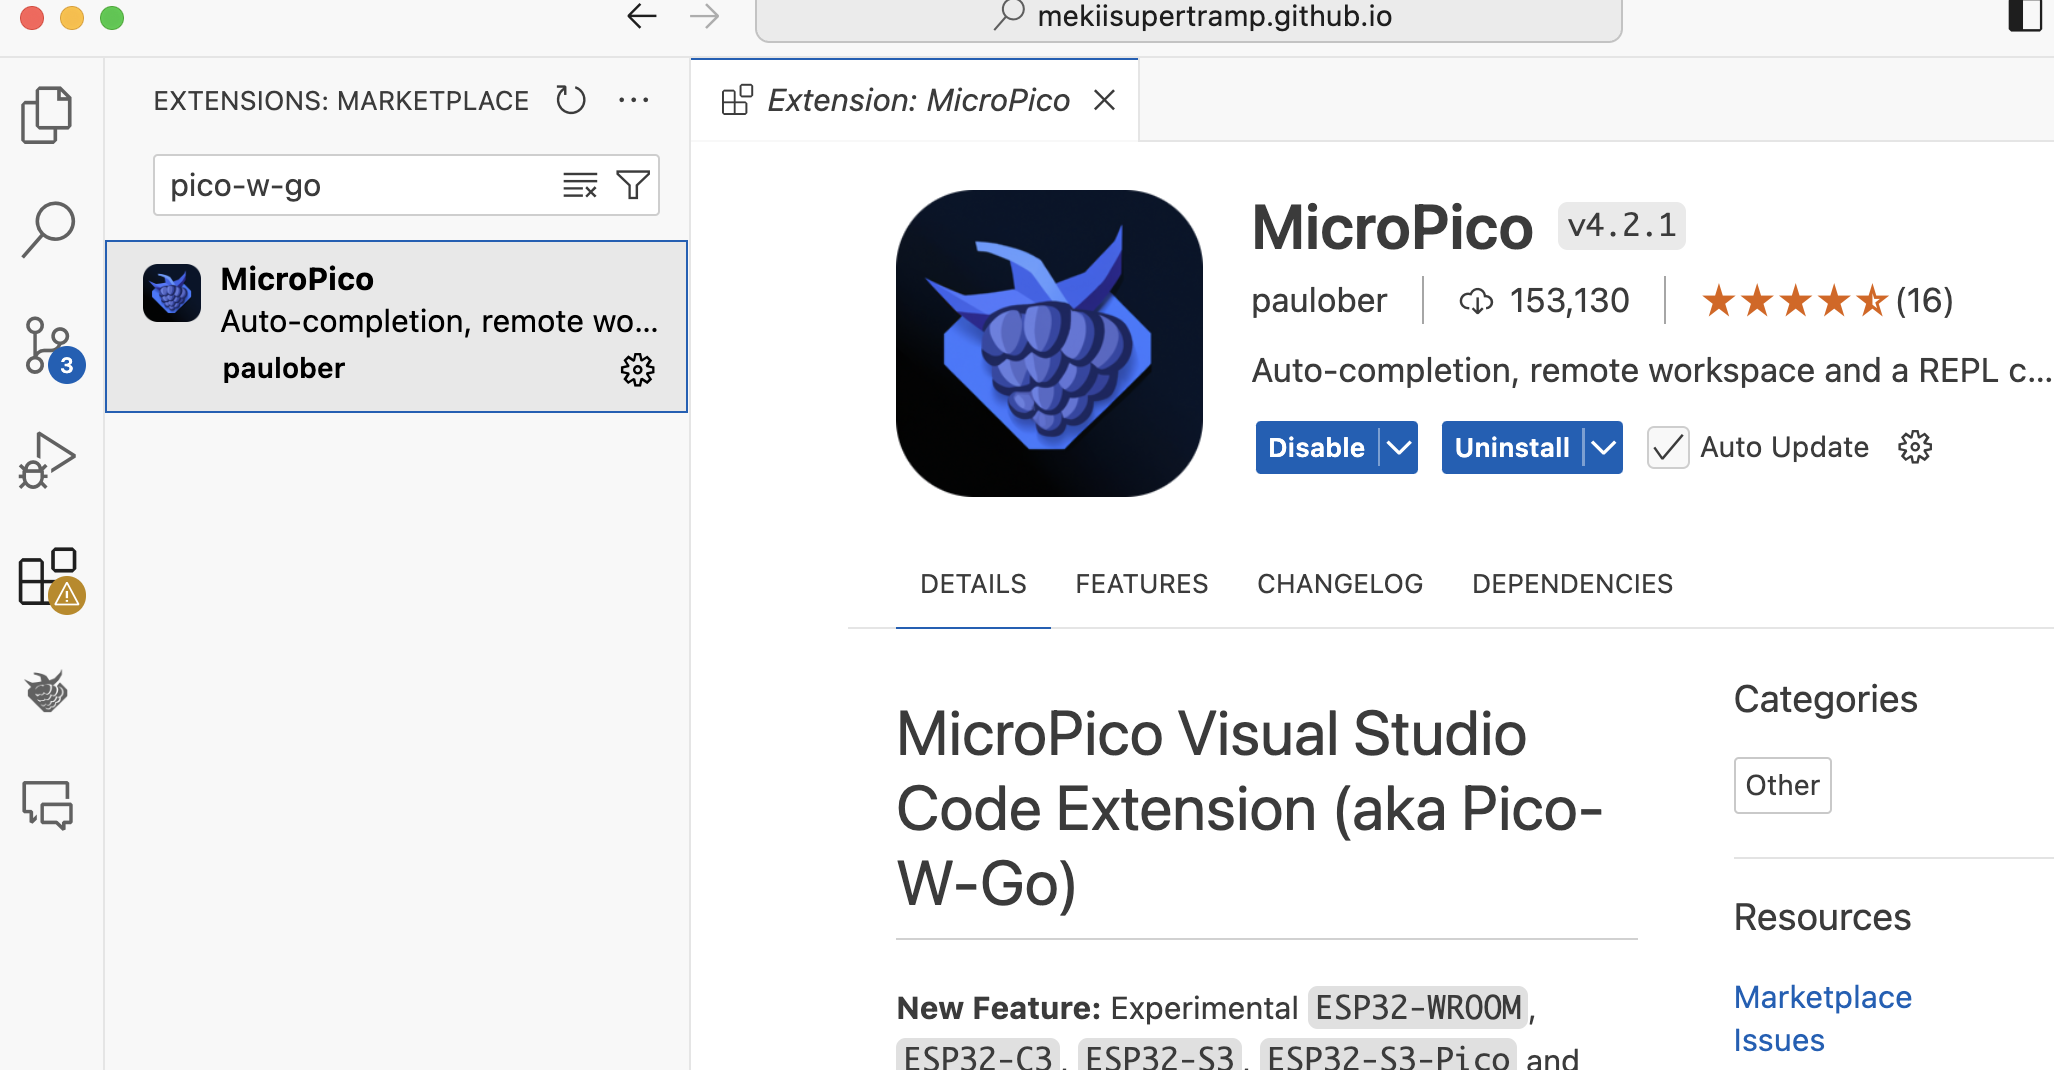
- Install the MicroPico Extension:
- Search for “MicroPico” in the Extensions view.
- Install the “MicroPico” extension.
RPi Pico W pinout
Step 3: Configure VS Code
- Open a Folder:
- Open a new folder or an existing project folder where you will store your MicroPython scripts.
- If new project,
Ctrl+Shift+Pand then “Initialize MicroPico project”
- Configure the MicroPico Extension:
- Go to the Command Palette by pressing
Ctrl+Shift+P. - Type “MicroPico: Connect” and select it.
- Follow the prompts to connect to your Pico W board.
- Go to the Command Palette by pressing
- Create a New MicroPython Script:
- Create a new file with a
.pyextension in your project folder. - Write your MicroPython code in this file.
- Create a new file with a
Step 4: Upload and Run Your Code
- Upload the Script:
- Save your script.
- Use the Command Palette (
Ctrl+Shift+P) and type “MicroPico: Upload and Run” to upload and run your script on the Pico W. - Or use this icons if connected properly:
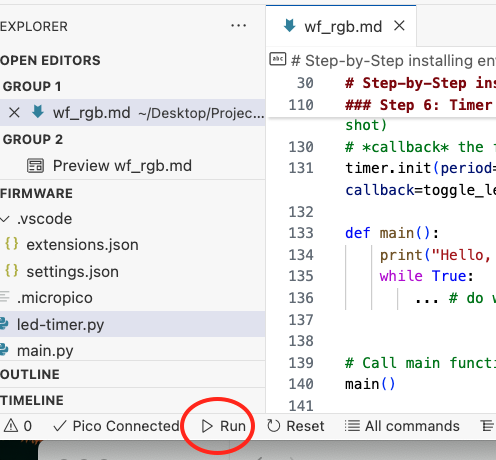
Run
Terminal shows up
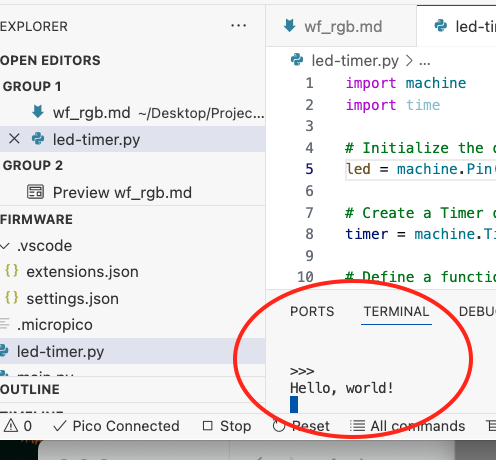
- Interact with the Serial Monitor:
- To view the output from your Pico W, use the Command Palette (
Ctrl+Shift+P) and type “MicroPico: Serial Monitor”. - This will open a terminal window where you can see the output from your script running on the Pico W.
- To view the output from your Pico W, use the Command Palette (
Step 5: Example Code
Here is a simple example of a MicroPython script to blink an onboard LED:
import machine
import time

# Initialize the onboard LED
led = machine.Pin("LED", machine.Pin.OUT)

# Blink the LED indefinitely
while True:
    led.on()
    time.sleep(1)
    led.off()
    time.sleep(1)
Step 6: Timer improvements
The folowing code provides another way of driving the led by setting a timer (newbies)
import machine
import time

# Initialize the onboard LED
led = machine.Pin("LED", machine.Pin.OUT)

# Create a Timer object
timer = machine.Timer()

# Define a function with timer as parameter
def toggle_led(timer):
    led.toggle()

# Initialise the timer to call the function *toggle_led*
# *period* in milliseconds
# *mode* calling the function periodically (vs one shot)
# *callback* the function to be called
timer.init(period=200, mode=machine.Timer.PERIODIC, callback=toggle_led)

def main():
    print("Hello, world!")
    while True:
        ... # do what you want


# Call main function
main()
You can find it here
LED
RGB
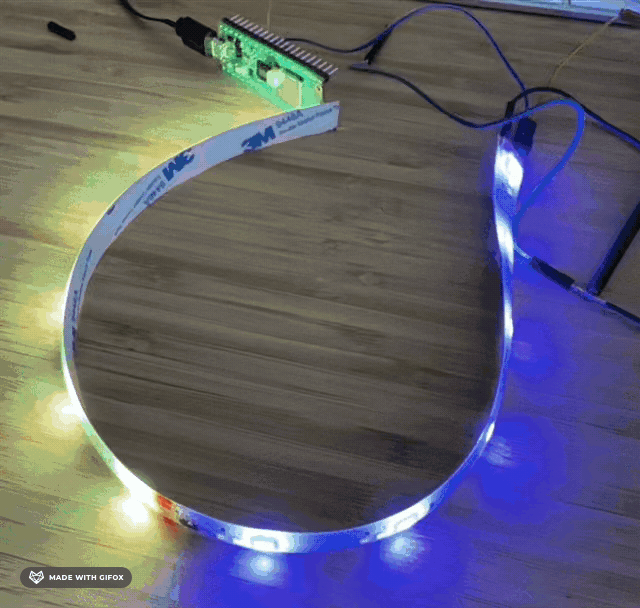
Here is an example on how to drive the RGB stripes.
Initialisation
# Setting the GP0 pin (#1 on the RP2040's connector)
pin = machine.Pin(0)
# Setting the number of stripes
ledQty = 2
# Create a strip object
strip = neopixel.NeoPixel(pin,ledQty)
Set colors & write to strip
# set color BRG (24=3*8 bits)
b = 30
r = 30
g = 0
strip[0] = (b, r, g) # type: ignore | purple
b = 0
r = 30
g = 30
strip[1] = (b, r, g) # type: ignore | yellow
strip.write()s

RGB first colours
Do something random
# Do something completly random (what? it's my code!)
while True:
    time.sleep_ms(20)
    b = b+10
    g = g+5
    if b > 80:
        g = g+10
    strip[0] = (g,30,15) # type: ignore
    strip[1] = (0, b, g) # type: ignore
    strip.write()
RGB random
Next
At this stage, all components have not been selected. Details regarding the electronics will be outlined in a separate post. The next one will focus on how to run an HTTP server on the Pico, and drive the LED via the server. For more information, please see: https://github.com/mekiisupertramp/wallframe/blob/main/rgb.py